Battle Formation Editor

New battle formation editor
Battle Formations were how you use your cards in a Force Collection PVP Environment. There were two Battle Formations you must setup: Offensive & Defensive.
Formations definitely required strategy, based around not only your current cards, but what you are able to see of your enemies formation. Randomly placing cards in an unoptimized formation may result in a loss vs an opponent that one could defeat with a properly optimized formation.
Force Collection, by default, automatically placed all cards for you, based on their Attack Power and their Range.
Increasing CAP[]

Dooku (5 Star)
CAP is a stat that you can increase with Stat Points, which are accumulated by leveling and adding Allies. Every card that you place has a cost. As one can see from the example at the right, a 5 Star Dooku has a cost of 19, while a 1 Star might have a cost as little as 3 and a Stack Set has a cost of 1.
Increasing ones CAP allows for placement of more powerful cards, as well as an increased quantity of quality cards. Often, when starting, many formations tend to have numerous vehicles or Stack Cards to ensure maximum efficency, however, once ones CAP reaches a high enough point, Stack Cards and Vehicles often become obsolete.
Range of Cards[]
Each card has one of three ranges associated with it: Short, Medium and Long.


.jpg)
Formation Editor[]
The Formation Editor has numerous options, and it is recommended that one "plays" with all of the features to become better acquainted with the system. This section will provide an outline of abilities of the editor.
Offense/Defense Tabs[]
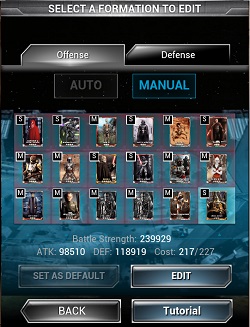
The Offenese and Defense tabs at the top of the editor allow you to switch between the two formations. Once one selects either Defense or Offense, they must select the EDIT button to access the actual editor.
Editing The Formation[]

Battle Editor


New battle editor


Support Cards.
The Battle Editor allows you to swap cards, remove cards and add cards to your formation. It also provides a current Attack and Defense rating, as well as your current cost and CAP.
You can swap two already placed cards by touching the first one and then touching the second card you wish to place.
The bottom section allows you to choose a card that you do not have placed and tapping where on the grid you want it to be placed. Also it provides access to currently built vehicles and stack cards.
Please note that you are unable to place cards with more cost than your CAP. Also, if you lose stat points in your Cost from, for example, dropping an ally, and your CAP drops below your current cost, the highest cost card in your formation will be removed automatically from your formation.
Once you have completed your formation as you want it, you can click save.
Auto Menu[]
The Auto Menu allows you to have the game choose your formation for you. It also allows you to copy one formation to the other. For example, if you are currently editing your Offensive Formation, you can copy your Defensive Formation to what you are currently editing, and vice versa. However, the Auto Formation was removed after an update and is currently not aviable, so all Formations have to be made manually.
Benefits of Having Multiple Formations[]
Since any attacking enemies can only see part of your formation, you can leave weaker cards in the front row, which can often surprise enemies if you place your strongest cards in the second row of a formation (Cue: "It's a trap!"). While attacking, however, your formation will not be seen by an opponent before the battle happens, so, as such, placing strategicly weak opponents in the front row is not required.
Stack Cards and Vehicles While Attacking[]
It should be noted that any Stack Cards used while attacking an opponent, if you lose, will be lost, and vehicles will take damage. Once a vehicles are fully damaged they are lost. However, using these kinds of cards in a defensive formation will not hurt them if you lose.
Basic Formation Strategies[]
Balanced[]
This formation style is the most simple to implement, and often the most effective, especially early. Simply load the battlefield with your most powerful cards based on total stats, and overwhelm your opponent with sheer numbers.
Hold The Line[]
The basic tank/damage build. Load your frontline with high-defense cards, and fill your backlines with high-attack medium-ranged cards. This allows your high-damage cards to attack while your defensive cards take the punishment. The downside to this formation is that when a frontline card falls, the cards behind it will fall quickly.
Flanking[]
This formation focuses on destroying one side of the enemy formation and cleaning up the remainder with attacks from multiple columns of cards. Put your most powerful cards on one side of the formation and defensive cards on the other side. The defensive side holds out while the strong side breaks through.
Bulkhead[]
Similar to the Flanking formation, the bulkhead places the strongest cards in the middle and weaker cards to the sides. The idea is to punch through middle columns and force the enemy outer columns in to replace the fallen mid-columns, drawing their fire away from your weak cards on the outside.
This strategy has the drawback that your opponents cards will collapse into the middle to fill any holes. If your strong flank defeats the opposite side, they may be left with no opponent at all, leaving your weaker cards in the middle to carry the battle, while your strongest cards are idle. The bulkhead formation above does not suffer from this problem.
Hybrid[]
A combination of multiple of the previously defined formation strategies. For example, a combination of Hold The Line and Flanking techniques. Put your most powerful defensive units on the front line, in order, from one side to the other. Do the same with your most powerful offensive units in the backline. This will result in a formation which is stronger on one side than the other, showing traits of both Hold The Line and Flanking strategies. This formation suffers from the same problem as the Flanking formation.
Formation Skill Choices[]
A successful formation combines skills that properly strengthen their formation and weaken their opponents. Choosing the right skills can be challenging but done correctly can swing the battle in your favour allowing your to win against higher battle strength opponents. It is important to understand the benefits and limitations of any given skill so you can squeeze the most power from it. Keeping the key points, listed below, in mind should allow you to form a more cohesive formation that will give you higher success in battles against your opponents.
Skill Breakdown
- (SML) vs (MED) - Skills are ranked as either (sml) or (med). What this means is a (sml) skill has a base 5-10% effect and a (med) has a 15-20% effect.
- Broad vs Specific - Every skill gives a range of what card type it targets. Skills that include "all" such as C3PO, R2D2, DoDonna & Tarkin impact all units regardless of alignment but have a low chance to proc. More specific skills like "All short defense up" or "All rebel attack up" are more focused on who they buff but are also more likely to proc. The focus of the skill you choose to level will then help you in determining the cards you want to collect and trade for.
- For example, 4* General Grievous increases Droid Evasion. If you choose to level this skill then your formation should include as many droid characters as possible so you can make the most of his boost. So including IG88, 4-LOM, R2D2, B1 Battle Droid etc. will assist in your fight. As well, since the skill is not alignment specific you can use cards from LS, DS and neutral thereby increasing your pool of available droid units.
- Buff vs Debuff - Another choice you need to make is whether to focus on a skill that buffs your units or debuffs your opponent's.
- Buffing your own units is easier as you will know the number of your units impacted and the resulting boost they will receive. As explained in the General Grievous example above.
- Debuffing your opponent is a bit more of a guess. There are some cards (ex. Tarfful - Droid defense down) that are very specific and may be an extremely strong debuff against specific formations or be a complete waste of one of your 3 global skill proc's per battle. When choosing a debuff you want to ensure you're impacting as many units of your opponent's as possible. One way to set this up is the prebattle front line view. Many times you can get an idea of the formation a player is running by their front line. Edit your formation to include the appropriate debuff and setup your battle to be more in your favour. A player's leader can also hint at their formation plan. Another debuff strategy is to include several different possible skills that are very specific. If a formation does not include a viable target for a skill, then that skill cannot be chosen to proc and will be bypassed. Using Tarrful as an example, if there are no droids in the opposing formation then his Droid defense down skill will not be queued and other skills that are in the formation will be pooled instead. The downfall with this technique is that a diverse opposing formation will make the proc choices much more random.
- Global vs Unit - Global skills activate at the start of a battle and remain for the entirety of the battle. Unit skills activate each round (based on the % proc chance).
- Global skills are limited to 3 activations per battle so it is imperative that you have at least 3 global skill units in your formation to take full advantage of the buff/debuff. Cards with the highest skill level are checked first when procs are determined. Ensuring that you level the skills that most suit your build is essential to ensuring they activate before less beneficial skills.
- For example, if you had 3 level 40 skills and a level 39 skill, the game would check the level 40 skills for a proc first. If all 3 level 40 skills proc it would stop there. If only 0-2 of the level 40 skills proc it will move on to the level 39 skill to check for a proc. It is beneficial to level the skills you most want to proc higher than the skills you are using as a backup.
- Unit skills are activated each round based on their proc chance. Unit skills include the Malaki buff to 3 beasts or Zam Wessel's buff to herself. Unit skill buffs are much stronger then global buffs but they do only affect a limited number of units. There does not appear to be a limit to the number of unit buffs that can proc in a given round.
- Global skills are limited to 3 activations per battle so it is imperative that you have at least 3 global skill units in your formation to take full advantage of the buff/debuff. Cards with the highest skill level are checked first when procs are determined. Ensuring that you level the skills that most suit your build is essential to ensuring they activate before less beneficial skills.
Formation Tips[]
- If you leave a space in the front line of your offensive formation, short range ally leader cards will fill the spot. Since most people's leader is at least the 5* Luke or Vader, this can be a powerful addition to your line. If the leader card selected is medium range, your line will move forward to fill the spot, so put a decent card behind the empty spot.
- Healer and mechanic cards can heal the card in front, behind, left, or right of them. They can only heal one of those cards per turn, however, and will heal the one with the largest percentage of HP missing. Put the healer behind your strongest defensive or offensive card to keep it alive longer. Many battles have been won with nothing but a very strong card, with a pocket healer. This is especially true for defensive battles, where you don't actually have to win, just survive 60 rounds.
- Healer and mechanic cards seem weak, with only a few hundred HEA (ATK) points. But remember, damage a card takes is equal to your the opposite card's ATK, minus your card's DEF. That delta is also only a few hundred points, so a sufficiently enhanced/evolved healer card can keep its patient at almost full HP.
- Stack cards can stack up to 40 but at a high CAP cost. The resulting unit is extremely strong but may not be worth the CAP cost depending on your formation build.
- Except for vehicles and sniper attack types, all cards only attack the front line. Put strong defensive cards in the front line, with strong offensive medium range cards behind.
- If you can't fill all spots in the formation, it may be better to pile all the cards deep in one area rather than spreading them out evenly. This will focus their attack power, allowing you to eliminate enemy cards more quickly, which will take the pressure off of the cards without reinforcements.
- Medium range skill cards, even if they have poor ATK and DEF scores, are often still worth it for the bonuses they give to other cards. Try to build a synergy between the cards in your formation and the skills you are enhancing.
- Skills are an important part of your formation and should be chosen with care.